Search This Blog

Wednesday, April 25, 2012

Momo - Nepalese Dumplings that you can't say no to!


My friend Sooji (that's what I call him!) is from Nepal - home to Mount Everest - highest point on Earth (Sooji is not that tall though!).  When it comes to cuisine, Nepal being landlocked by China and India, has a good mix of fusion dishes from these countries.  Some of these dishes take their lead from both Chinese or Indian styles of cooking, and turn it into something unique.  I have eaten the ever familiar curry and rice dishes at Nepalese restaurants and also had their version of stir fry.  One thing that is a rarity in Melbourne though, is a Nepalese joint that serves good Momo.  For those that don't know, the momo has a very similar likeness to Chinese or Japanese dumplings.  The difference is that momo has a spicy curry masala that flavours the filling as opposed to the basic, and sometimes quite generic, dumpling mix.  "And you can't say no no to some good momo"  
Sooji has been going on about his home-made momo ever since I met him. We've eaten momo at a Nepalese cafe but he insists that their's is mediocre, compared to the way he and his housemates, from the homeland, make it.  Recently, I finally received an invite to his place for momo.  And as he put it - "Bring your appetite and come early, as momo at my place means you have to help make them too!"  How could I turn down such an invitation - learn a new dish, take some pics and enjoy an evening feasting on authentic momo.         
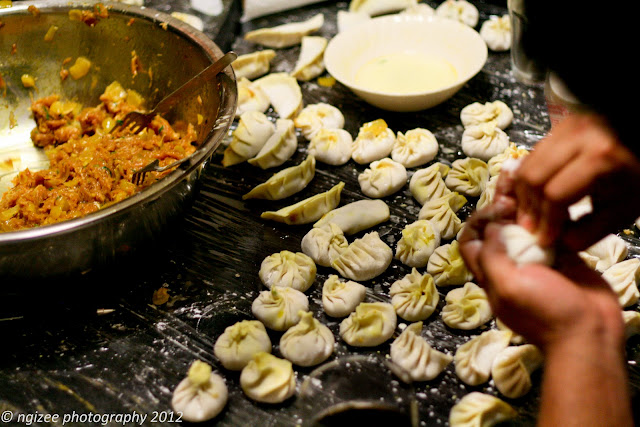
Sooji went a bit overboard and thought he was catering for an army - so I think we collectively whipped up over 350 of these delicious dumplings.  There were leftovers for everyone to take-away.  So whilst the pictures show the quantities from 3 kilograms of minced meat filling don't be dissuaded as I have scaled the recipe down to 1 kilogram.  This should make between 90 - 100 momo and they freeze well too - if you have any leftovers.  Generally, it's ten per serve, but on this night I had to put the brakes on after number 23 (Mind you that was within a span of 3 hours!)
Directions
For the filling [STEP 1]
1kg x Minced Meat (we used a mixture of pork & chicken)
2tbsp x Momo Masala (Available at Indian grocers - we used Century brand)
2tbsp x Mustard Oil
1tbsp Ginger, grated
1tbsp x Garlic, crushed
2tbsp x Coriander leaves, chopped
Combine all ingredients in a large bowl, cover and marinate while you prepare the next step

[STEP 2] 
1tbsp x Vegetable oil
1tsp x Cumin seeds
3 x Onions, finely diced
1tbsp x Ginger, grated
1tbsp x Garlic, crushed
1tsp x Turmeric powder
Heat the oil in a skillet then add the cumin seed and stir until they start to pop
Add the diced onion allow to sweat down for 5 minutes
Now add the ginger, garlic and turmeric and stir through
Cook for another 5 minutes, then allow to cool. 
[STEP THREE]
Combine the onion mix with the meat
Then use your hands to mix everthing together

For the momo wrapper the most readily available is the Gyoza dumpling skins.  This pack of around 100 is perfect for the job.
[STEP 4]
Fill and shape the momo
Traditionally momo looks like the one below, but by the end of the night there were at least 5 or 6 variations.  It all tastes the same in the end and as long as they do not open up when being cooked, then it's acceptable. Just be sure to seal the momo well.
30 SECOND MOMO FILLER
Line up the momo on a cling wrapped surface to prevent sticking

Here is another rather authentic looking shape that the experts seemed to do with ease - mine unfortunately did not look so good. 

Ready for a good steaming!
Getting lessons from the expert!


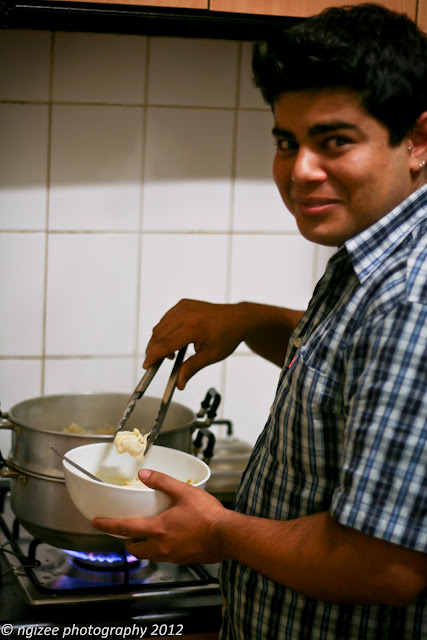
Cooking up a storm or was it a soup?

Pretty nice looking momo! Truly was a work of art.
When shaping the momo its best to have a bowl of water to dip fingertips into so that you can dampen the sides of the skins before sealing the filling in.
CHECK OUT THE MASTER AT WORK!
This soup is optional, I was told, as steamed momo can be eaten with just a simple dipping sauce to accompany. But after trying it dribbled all over the momo in a bowl, I decided to include it as a "definitely not optional" - and it's easy to make too.


[STEP FIVE]
For the soup

1tbsp x Vegetable Oil
1tsp x Cumin Seed
2 x Onions, finely diced
1tsp x Ginger, grated
1tsp x Garlic, crushed
1tsp x Turmeric powder
2-3tbsp x Meat filling (this adds a little extra flavour to the soup)
4 x Tomatoes, roughly chopped
2tbsp x Coriander leaves, chopped
Salt to taste
Water to dilute
Directions

In a skillet heat the oil on medium heat
Add the cumin seeds and fry for 30 seconds then add the onions
Lower the heat and cook the onions down for 5-6 minutes
Now add the ginger, garlic and turmeric and stir well
Add the mince and using the back of a spoon, mash the mince so that it mixes through the soup evenly
Toss in the tomatoes and increase the heat to bring to a boil
Reduce heat and simmer for 30 minutes adding water gradually, to make the soup a thin runny consistency
Taste for salt and adjust accordingly 
Add in the chopped coriander leaves
When soup is ready remove from heat as this soup is served cooled over hot steaming momo

[STEP SIX]
Cooking the momo
Place a litre, or so of water in the base of a steaming pot and line the steamer's surface with a little oil to prevent sticking
Arrange the momo in a single layer allowing enough space between them to expand


Cover with the lid and steam for 12-15 minutes.

If you have a double steamer, swap the bottom tray and top trays half ways through so the momo cook evenly 
 [STEP SEVEN]
Serving the momo
To serve, place hot steaming momo into a bowl
Ladle a couple of spoonfuls of the soup over the momo
Grab a spoon and dig in - no hesitation!   
Silence around bowls of momo and soup - the payoff for an evening's work!
You can't say no to some good momo!

Tuesday, April 24, 2012

Sooji Halwa - Dessert...or even breakfast???

I must be feeling very nostalgic lately, since I keep making dishes that remind me of my childhood in India. This dish can easily be mistaken and served as a dessert to follow a nice curry, and it would probably go down well too. But my memory of Sooji Halwa, is eating it as a breakfast dish enveloped in soft deep fried puris. Think pancake like parcels with the sweet fragrant halwa inside. Sooji Halwa which is prepared with semolina is made very similary to porridge.  In fact, I remember my dad making it on its own for breakfast and calling it a Sooji porridge. Since being in Australia, I don’t think I have seen it being served at any Indian take-aways and I do not know why – I think it would make a perfect cheap breakfast.  In this version of it I have decreased the amount of liquid so that it is of a firmer consistency and I was able to put it into a plastic container, as a mould. It did get served as a dessert at a Nepalese friend’s house, since his name sounds a little like Sooji – and I told him I would make some for him some time. Hope you enjoyed it “Sooji Cracker”.
Ingredients
2 cups x Coarse Semolina
4 tbsp x Ghee, or 50g x Butter
1tsp x Ground Cardamom Seeds
1 stick x Cinnamon
¾ cup x Caster Sugar
2 cups x Water, boiling hot
1 cup x Milk, heated
½ cup x Thickened Cream
100g x Cashews/Almonds/Pistachios (your choice when it comes to the nuts, just chop them coarsely)
50g x Sultanas or Raisins (I didn’t use any in this recipe and found it wasn’t missed – by me anyway!)
Directions
Melt the ghee or butter on medium heat in a non-stick pan and add the cardamom and cinnamon
Fry for a few seconds then add the semolina and stir continuously so that it starts to roast the grains
After about 5 minutes the semolina will be nicely browned and very fragrant
Add the hot water and milk folding to combine into a thick porridge like consistency
Next add the chopped
Keep stirring for another 5 minutes then add the cream and mix well
At this point if you wanted to go the porridge way then add more milk or water to get it to the consistency you desire and serve immediately
If it is to be a dessert then remove the cinnamon stick and transfer to an appropriate mould
Cover and place in the fridge until firm and set
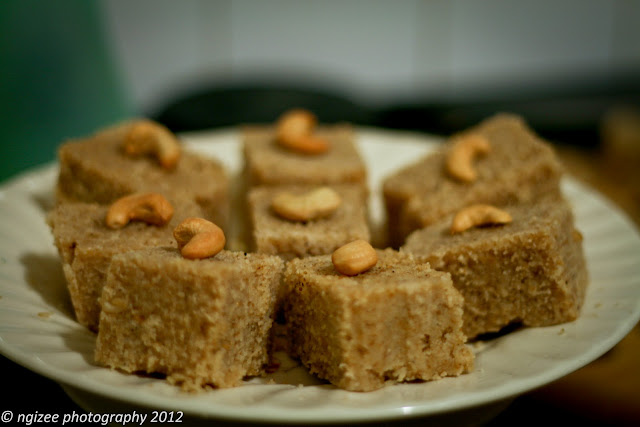
Turn the halwa out, onto a plate and cut into squares before serving
Garnish with an cashew or almond on each square for decoration
"Semolina is collected during the process of wheat milling.  Wheat grains are processed by machinery that removes the bran and germ. The starch that covers the germ breaks up during the process and is filtered to form semolina and other grades of flour.  It is very absorbent and can take on a lot of liquid when cooked."
"Halwa made from semolina can be found being made in many countries from Greece to the Middle East.  This recipe hails from the North India region"

Sunday, April 22, 2012

Eggplant filled with Tuna

I love eggplant! I really do! Even my mother finds it hard to believe, since I was a very fussy eater when it came to most vegies.  Eggplant is one of the most featured vegetables on this blog, and rightfully so.  I have prepared it Asian style and Indian style and even tried to replicate my Bangladeshi mother-in-law's recipe.  I took a punt on this recipe as I wasn't too sure how tuna would taste with eggplant.  The result was a well received dish that goes well as a starter or even as a main with some crusty bread to mop up the juices.    The tuna is also interchangeable with minced meat if you wanted a less fishy dish.
Ingredients, to serve 4
2 x Medium sized Eggplants
Olive oil
1 x Small Onion, finely diced
2 x Cloves Garlic, crushed
1tsp x Dried Oregano
250ml x Pasta Sauce
300g x Canned Tuna, drained
Salt, to taste
1 cup x Breadcrumbs (optional)
2tbsp x Sesame seeds, toasted (optional)
Grated Cheese (optional)  
Directions
Preheat oven to 200 degrees Celsius
Cut both eggplants length ways into four halves
Using a sharp knife cut a 1cm width around the flesh, do not pierce the skin
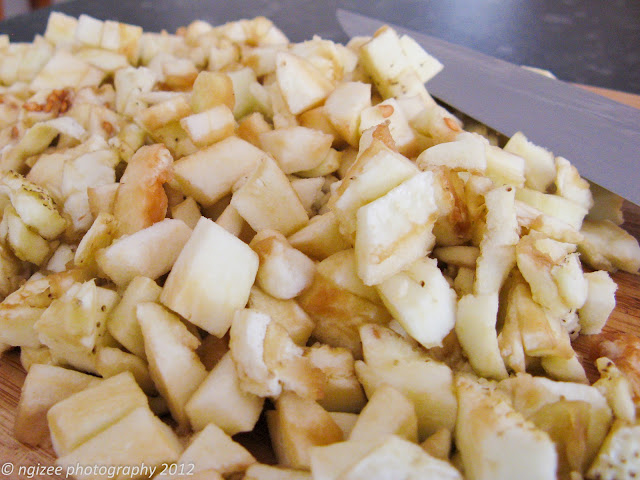
Scoop the scored eggplant flesh out with a spoon and chop into rough pieces
Place the four halves in a baking dish and drizzle with olive oil
Turn oven down to 180 degrees and place dish in oven
Allow to bake for 25 minutes or until the eggplant starts to soften and collapse slightly
If the surface starts to brown too much, cover with aluminium foil 
For the filling
Heat 2 tablespoons of olive oil in a sauce pan
Add the onion and cook for 3 minutes or until soft then add the garlic and oregano
Now add the reserved eggplant flesh and stir fry for 5 minutes 
Pour in the pasta sauce and stir through
Break up the tuna with a fork and add to the mixture stirring well to combine
Cook for further 3-4 minutes or until the liquid has dried slightly
Remove from heat and allow to cool before dividing the mixture into four
Spoon the mixture into the eggplant halves and return to the oven for a further 20 minutes
As an optional topping, sprinkle breadcrumbs mixed with toasted sesame seeds on the eggplant before returning to the oven, or sprinkle grated cheese and bake for 20 minutes.  

Tuesday, April 17, 2012

Pantay Khao Suey...my special birthday dish


I am thirty something years young now and for about the last 15, or so years, on my birthday, my mum makes me the same dish.  It’s one of very few food rituals that exists in our family and I guess I am little spoilt to be the recipient of this dish.  More so, special, because my mum is not the chief cook in the household – the kitchen tends to be the males’ domain for some reason, from my dad to me and my brother.  The dish that is synonymous with my birthday is a traditional Burmese dish that has been given an Anglo-Indian tweaking by my mum.  It’s called Pantay Khao Suey (pronounced parn-tay cow sway) and can best be described as a meaty curry soup enjoyed over noodles.  I have also made it a rule that this dish is not made on any of the other 364 days in the year – unless you want to celebrate my birthday twice.  As this blog of mine is in its first year, it was only right to add the recipe for Pantay Khao Suey and immortalize it forever on the internet.  This was not an easy task since neither of my parents have their recipes written down somewhere to refer to.  Instead they tend to know just what ingredients to put in and just how much of it.  So this time around I took notes and pictures – otherwise I would have to wait until next March.
Ingredients
For the curry paste
2 tsp x black peppercorns
2-3 x dried chilli
2 tsp x cumin seeds
2 tsp x coriander seeds
2 tsp x mustard seed
2 tsp x hing (a.k.a. asafetida available at Indian grocers)
4 tsp x tamarind extract
1 cup x water
1 tsp x salt
For the curry soup
1 kg meat, cut into thin strips (I insist on the meat being beef since Khao is pronounced “cow”, but chicken and lamb can be substituted)
2 tbsp x vegetable oil
5 x onions, diced finely
2 tbsp x garlic, crushed
3 tbsp x ginger, crushed
20 x curry leaves
1 tsp x chilli powder
1 tsp x turmeric
Water to cover
2 x 400ml cans coconut milk
Salt to taste
To serve
250g packet x thin vermicelli noodles cooked al dente (angel hair pasta is my preference)
Garnish
Coriander leaves, chopped roughly
Spring onion, sliced finely
Fresh chilli, sliced finely
Fresh lime, cut into wedges
Fried garlic, thin slices of garlic deep fried till crispy
Shrimp powder, roast dried shrimp in a dry pan then grind to a powder
Roasted noodles, break noodles into 2 inch lengths and dry roast noodles in a pan
Directions
For the paste grind all the whole spices and mix with the tamarind paste
Dissolve the salt in the water and stir through the spice mixture  
 Make a second paste in bowl combining the crushed ginger and garlic
Keep both aside while you start the cooking process
Heat oil in a heavy pot then add onion and fry gently until soft and golden
Stir in the garlic, ginger and curry leaves, and fry for 2 minutes until fragrant
Now add the chilli and turmeric powders followed by the curry paste mixture
Stir to combine then add the strips of meat and turn to coat with the spices


At this point check the seasoning and add extra salt if required
Add enough warm water to cover the meat and bring to the boil
Lower heat, cover pot with a lid and simmer for 30 minutes
Stir in the coconut milk and cook on low heat for a further 10 minutes
Adjust the consistency of the liquid adding extra water if you prefer a thinner soup

Serve the curry soup into bowls of cooked noodles

Sprinkle generously with your choice of garnishes – this is the best part and what sets Pantay Khao Suey apart from any other curry soup dishes, as you get to control the end flavour your own soup. 


 Now this is what a well garnished bowl of Pantay Khao Suey is supposed to look like - a little bit of everything - oh so delicious.


There was a festive group of family and friends who came to celebrate my birthday that night.  I think it was the largest group that my mum catered for. So here we go with some happy snaps of some of them enjoying a bowl of Pantay Khao Suey - made my mum's way.


"Recently I was dining at Laksame in the city and noticed a Khao Suey on their menu.  The dish tastes completely different to my mum's as it is based on a Thai Red Curry broth.  Nevertheless it was exceptionally good and I knew I had to try to make it at home.  Check out my recipe for Khao Suey Gai."